Walter Anderson ABC Styrofoam Block Prints

As part of our June vacation to the Mississippi Gulf Coast, we're revitalizing one of our favorite projects: Walter Anderson ABC Block Prints!
 |
| Walter Anderson made a whole series of alphabet prints that inspired this Try It Out! |
Born in 1903 in New Orleans, LA, Anderson attended some of the finest boarding schools and art academies in the country. His mother Annette McConnell Anderson attended the Newcomb School of Fine Arts in New Orleans and wanted all of her children to become artists. The family bought a tract of land on the Mississippi Gulf Coast in 1918 with the intention of turning it into a kind of family artist colony that would enable them to create and sell their art. Anderson joined the new family business Shearwater Pottery in 1928, where he lived and created until his death from lung cancer in 1965.
Descendants of the Anderson still live and create in Ocean Springs. Visitors can see his work on display at the Walter Anderson Museum of Art in downtown Ocean Springs, or they can enjoy the Peter Anderson Festival held during the first weekend of November each year.

Walter Anderson suffered from mental illness during the course of his life and developed unique and strange habits that scholars believe played a role in his artwork. After his last hospitalization in 1945, he started to visit Horn Island on an old, refurbished skiff he had found on the beach. He believed in bringing art and nature together to create a single entity and went to the island to "realize" this union. The Secret World of Walter Anderson by Hester Bass illustrated by E.B. Lewis, tells of Anderson's love for Horn Island and the artwork his trips inspired.
 |
| Accelerated Reader: Grade 5.9, 0.5 pts |
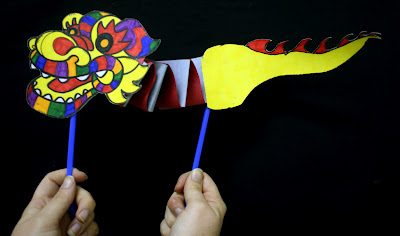
Styrofoam Block Printing with Crayon Resist Frame
Walter Anderson's favorite media were watercolor and block printing. This project fuses the two styles to create a unique project that showcases the artist's passion. If you're traveling near the Gulf Coast this summer, be sure to stop by the Walter Anderson Museum of Art to see some of the great painters work. Notice how he draws much of his inspiration from nature.
 |
| Follow the steps below to create your own Walter Anderson masterpiece! |
Materials:
Newspapers
Smocks
White Printing Foam
Cardstock
Permanent markers
Pens
Cardstock
Paper Plates
Brayers or Large Paint Brushes
Tempera Paint
Alphabet written backwards
Crayons
Watercolor
Bowl with Water
Estimated Time: 30-45 minutes
Set-Up:
Cover your workspace with newspaper and smock young artists. If working in a classroom setting, teachers can set up paint, brayers/brushes, and paper plates at the front of the classroom. When it's time to print, call students up and keep the wet print block to prevent messes spreading all over the classroom.
Before passing out the materials, have students brainstorm their favorite thing in nature and write it down. What letter does this thing begin with? In our example above, we chose the sea! It starts with S! Remind students that when we create prints, we have to write like we would see text in a mirror. Download this sheet to help young artists see how they should write their letters!
Project Steps:
1. Place white print foam in the center of card stock. Trace around the print foam using a permanent marker.
2. Use pen to draw a design into the print foam. Make sure to press down firmly and create deep indents in the foam without ripping it.

Walter Anderson studied under Adolfo Best-Maugard, an influential Mexican artist who believed that all art, no matter where or when it was created, contained seven motifs. Challenge artists to incorporate the seven motifs and their meanings into their print!
 |
| The seven motifs also include a straight line that represents the horizon! |
3. Once young artists are done creating their print block, they can use a brayer or a large paint brush to add a thin, even layer of paint across the top of the print foam. Place it paint down in the center of the rectangle and rub to make sure the whole design touches the paper and then peel off.

4. Using crayons, draw a border around the paint print while it dries. If the seven motifs weren't incorporated into the print, attempt to incorporate them into the border.
5. Finally, use the watercolors to paint over the crayon in the border. The waxy crayon "resist" the watercolor to leave the colorful design in place.
Enrichment
Warm and Cool Colors
Have children choose between a warm or cool color for their print color. They must then color their border using the opposite color temperature (warm print, cool border; cool print, warm border). In the example above,
Print Multiple Colors (Two Options)
Warm and Cool Colors
Have children choose between a warm or cool color for their print color. They must then color their border using the opposite color temperature (warm print, cool border; cool print, warm border). In the example above,
Print Multiple Colors (Two Options)
Option I: Use a paint brush to paint multiple colors onto the print foam (see the angel above).
Option II: Print using one paint color, but after it's dry, come back in with watercolor on top. Stay tuned for a future Try it Out when we'll make more detailed linoleum block prints!
Rules of the Seven Motifs
Best-Maugard only had two rules for the seven motifs. Try to keep them in mind while using them in prints.
Rule 1: Never cross lines
Rule II: Motifs in a border should be equidistant apart from one another
 |
| Walter Anderson practiced the seven motifs in this watercolor of brown pelicans; which ones do you see? |
Intervention:
For younger kids, printing letters backwards may be too hard for them to grasp. Have them create a picture on their print and then draw the letter in the border.